

How To Repair Bike Pedal Assembly
This article volition review the repair of stripped pedal crank threads using the pedal bushing repair kits. Annotation: Park Tool does not make or sell a pedal bushing repair kit. These kits are expensive and in most cases arm replacement in the best selection. This article is offered only as an explanation of the process.
1
Getting Started
What Tools do I need?
- Pedal Tap (TAP-3 or TAP-vi)
- Tap handle (TH-1 or TH-ii)
- Cutting fluid (CF-two)
- Threadlocker such equally TLR-ii
Bicycle cranks are typically aluminum. If the pedals threads are over tightened, the threads in the creepo may fail or "strip" (figure 1). It may besides occur that if the pedal was under tightened, and the bike is used, the pedal axle volition wiggle and move in the threads. This can also ruin the crank threads as the pedal works its manner out of the creepo and falls off. One repair option is of form to replace the crank. However for some cranks it possible to use a pedal bushing thread repair system. NOTE: This repair works best with cranks make of solid aluminum. This repair is not recommended for hollow arms or carbon fibers cranks.
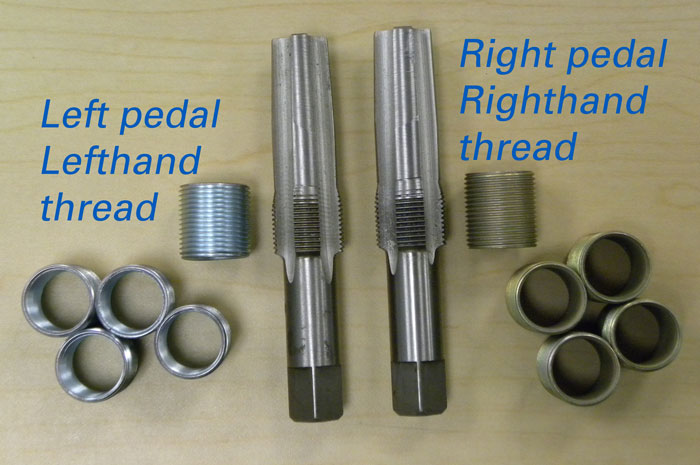
The bushing thread repair systems consist of a kit (effigy 2). At that place will be two special oversized taps plus bushings that are left-hand and correct-mitt threading. The taps include a long pilot section that acts as a reamer to remove any remaining thread inside the crank and to size the hole correctly for the larger threading.
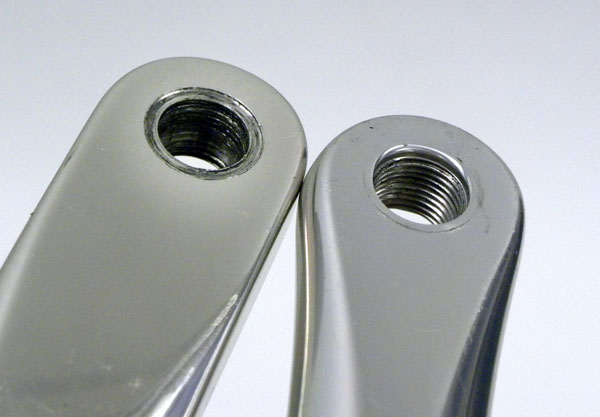
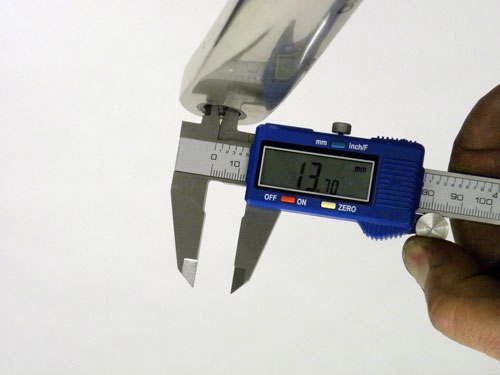
When thread standards are described, information technology is from the outside diameter of the thread, which is the external thread. Bicycle pedals are commonly a 9/16″ x xx threads per inch. The within diameter of the internal thread (the "nut") must be smaller. Measured in millimeters, the OD of the pedal is typically xiv.2mm. For cranks the internal thread is nominally 13mm. This allows overlap of the thread. Failed internal threads will look flattened and have a larger inside diameter (figure iii).
The pedal bushing repair kit taps will increment the size of the crank thread to accept a bushing of 5/8″ x twenty TPI threading. The within of this pedal bushing is sized to accept the 9/xvi″ x 20 TPI cycle pedal thread standard. This can be a proficient repair when done correctly. Withal, the pedal should not exist over torqued even with the bushing in identify. The stress of tightening is ultimately notwithstanding on the aluminum threads of the arm.
The crank must exist firmly head for tapping. Many modern artillery have tapered and odd shapes and are difficult to concur in a bench vise. Information technology can be more than useful to the the repair clamp to hold the arm for work.
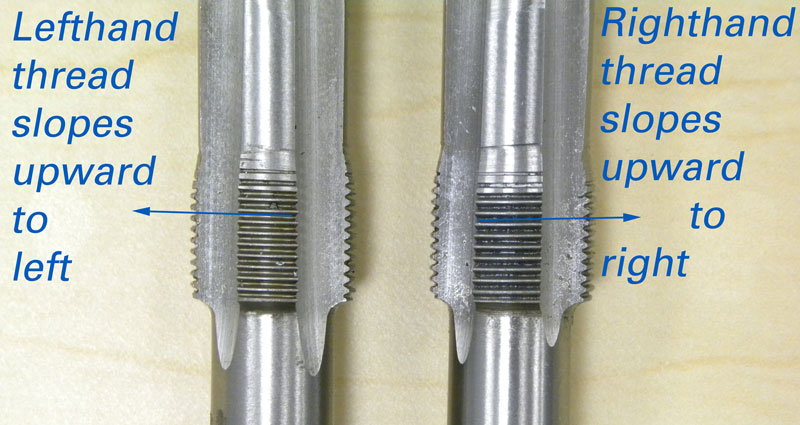
Bicycle pedals threads come in a Correct and LEFT mitt threading. The right side, as seen from the riders point of view, is a right-mitt thread and volition cutting clockwise. The left side is a left-paw thread and will cutting counter-clockwise. The taps are usually marked merely use care to correctly place the cutting direction and confirm which crank should get which tap (effigy 4).
2
Repair Procedure
Mountain the tap in a tap handle. Tap handles permit fifty-fifty pressure to applied during the cut. Exercise not effort this repair using an adjustable wrench.
The reamer section of the tap is tapered (figure 5). Use copious amounts of cutting fluid such as CF-2 Cutting Fluid from Park Tool. Rotate reamer the correct direction and employ pressure. Information technology volition take some piece of work to remove old threads and allow successful tapping up to the five/8″ size.
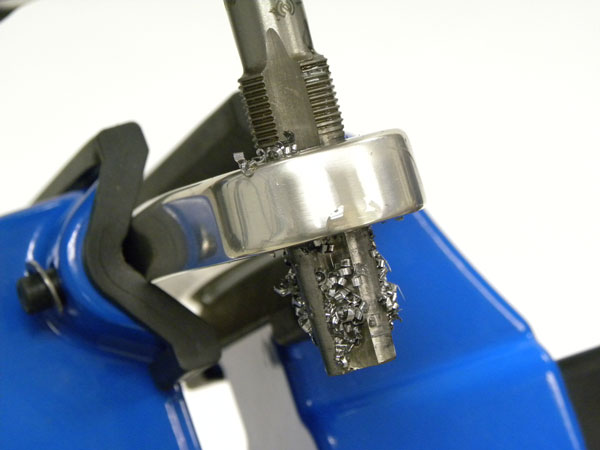
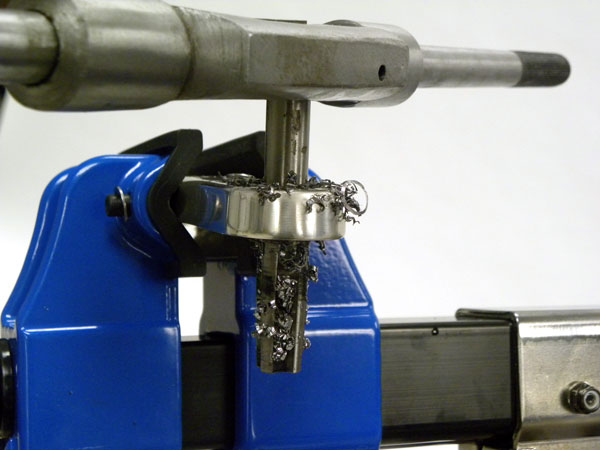
Cut slowly and stop oftentimes to apply more than cutting fluid. Laissez passer the tap completely through the arm, do not reverse the tap support the thread (figure half-dozen).
Clean all chips from tap and arm. Make clean threads in arm using acetone or alcohol. Arm is now set up for bushing.
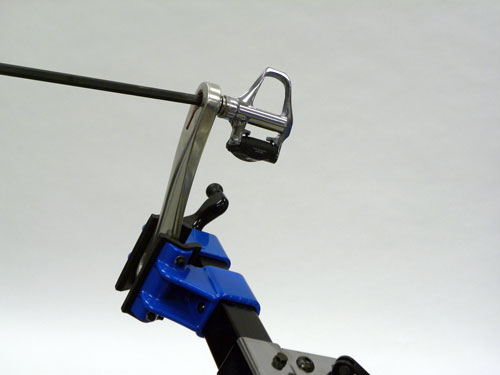
Select correct bushing. Use a pedal to act as an installation tool (figure 7). Employ a strong thread locker to outside of bushing. Employ a stiff thread locker to outside of bushing.

Thread bushing into arm (figure eight). Remove pedal from bushing immediately and fine tune bushing positioning.
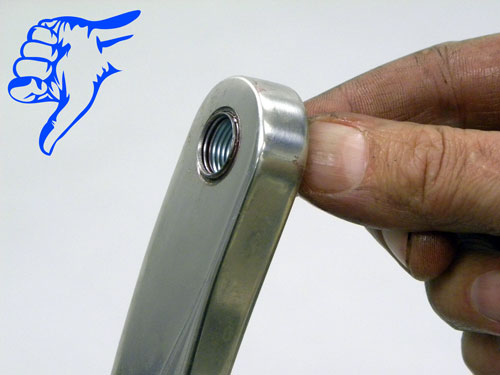
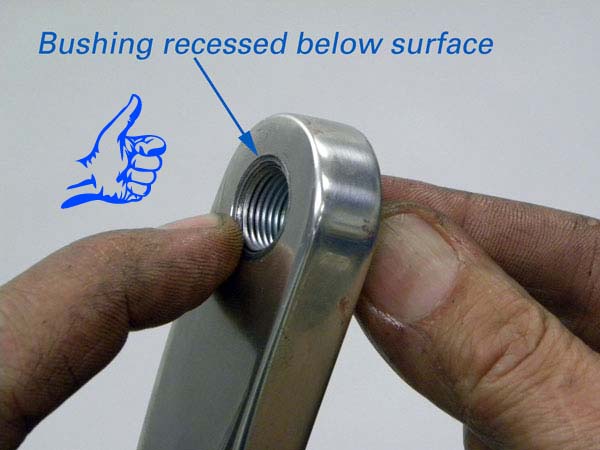
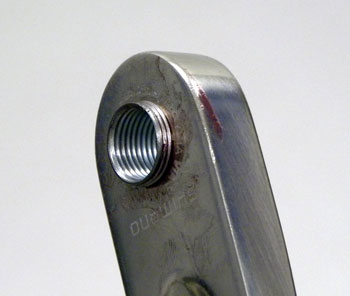
It is important the bushing be correctly adapted in the arm (figure 9). The head of the pedal shaft must press against the crank surface. The bushing must not stick by the outside surface of the creepo. The bushing should be slightly recessed.
Continue to rotate bushing until no bushing shows on outer face (figure 10). The caput of the pedal beam must press on the crank outer face, just as with normal cranks. The pedal threads pull against the bushing, which transfers the load to the five/8″ threads in the aluminum arm.
The bushings are typically longer than the thickness of the crank. The excess bushing width will stick out on the crank inner face (effigy 11). Information technology is typically best to just leave this excess. However ever cheque for any interference on the bike. It is possible to power sand or grind the bushing a little shorter. Still, work with care as it is hard to do cleanly and not mar the crank.
Allow thread locker to prepare and dry before greasing and installing the pedals. This volition take several hours.

Source: https://www.parktool.com/blog/repair-help/pedal-bushing-repair-kit-procedure
Posted by: brownforwas.blogspot.com
0 Response to "How To Repair Bike Pedal Assembly"
Post a Comment